はじめに
Cloud Runはサーバーレスなコンテナ実行環境を提供するGCPのサービスです。
Cloud Runを使うことによって、Dockerイメージを構築するだけでアプリのデプロイを簡単におこなうことができます。
この記事では、pythonのアプリケーションをCloud Runにデプロイする方法について述べます。
gcloudを使用するので、インストールできていない方は公式ドキュメントにしたがって、インストールしましょう。
この記事で使用したソースコードは以下のGitHubで利用できます。
システム構成
今回はフロントエンドを Streamlit 、バックエンドを FastAPI とし、2つのサービスをCloud Runにデプロイします。
フロントエンドのStreamlitは誰でもアクセス可能な一般公開としますが、バックエンドのFastAPIはStreamlit側からしかアクセスできない限定公開とします。
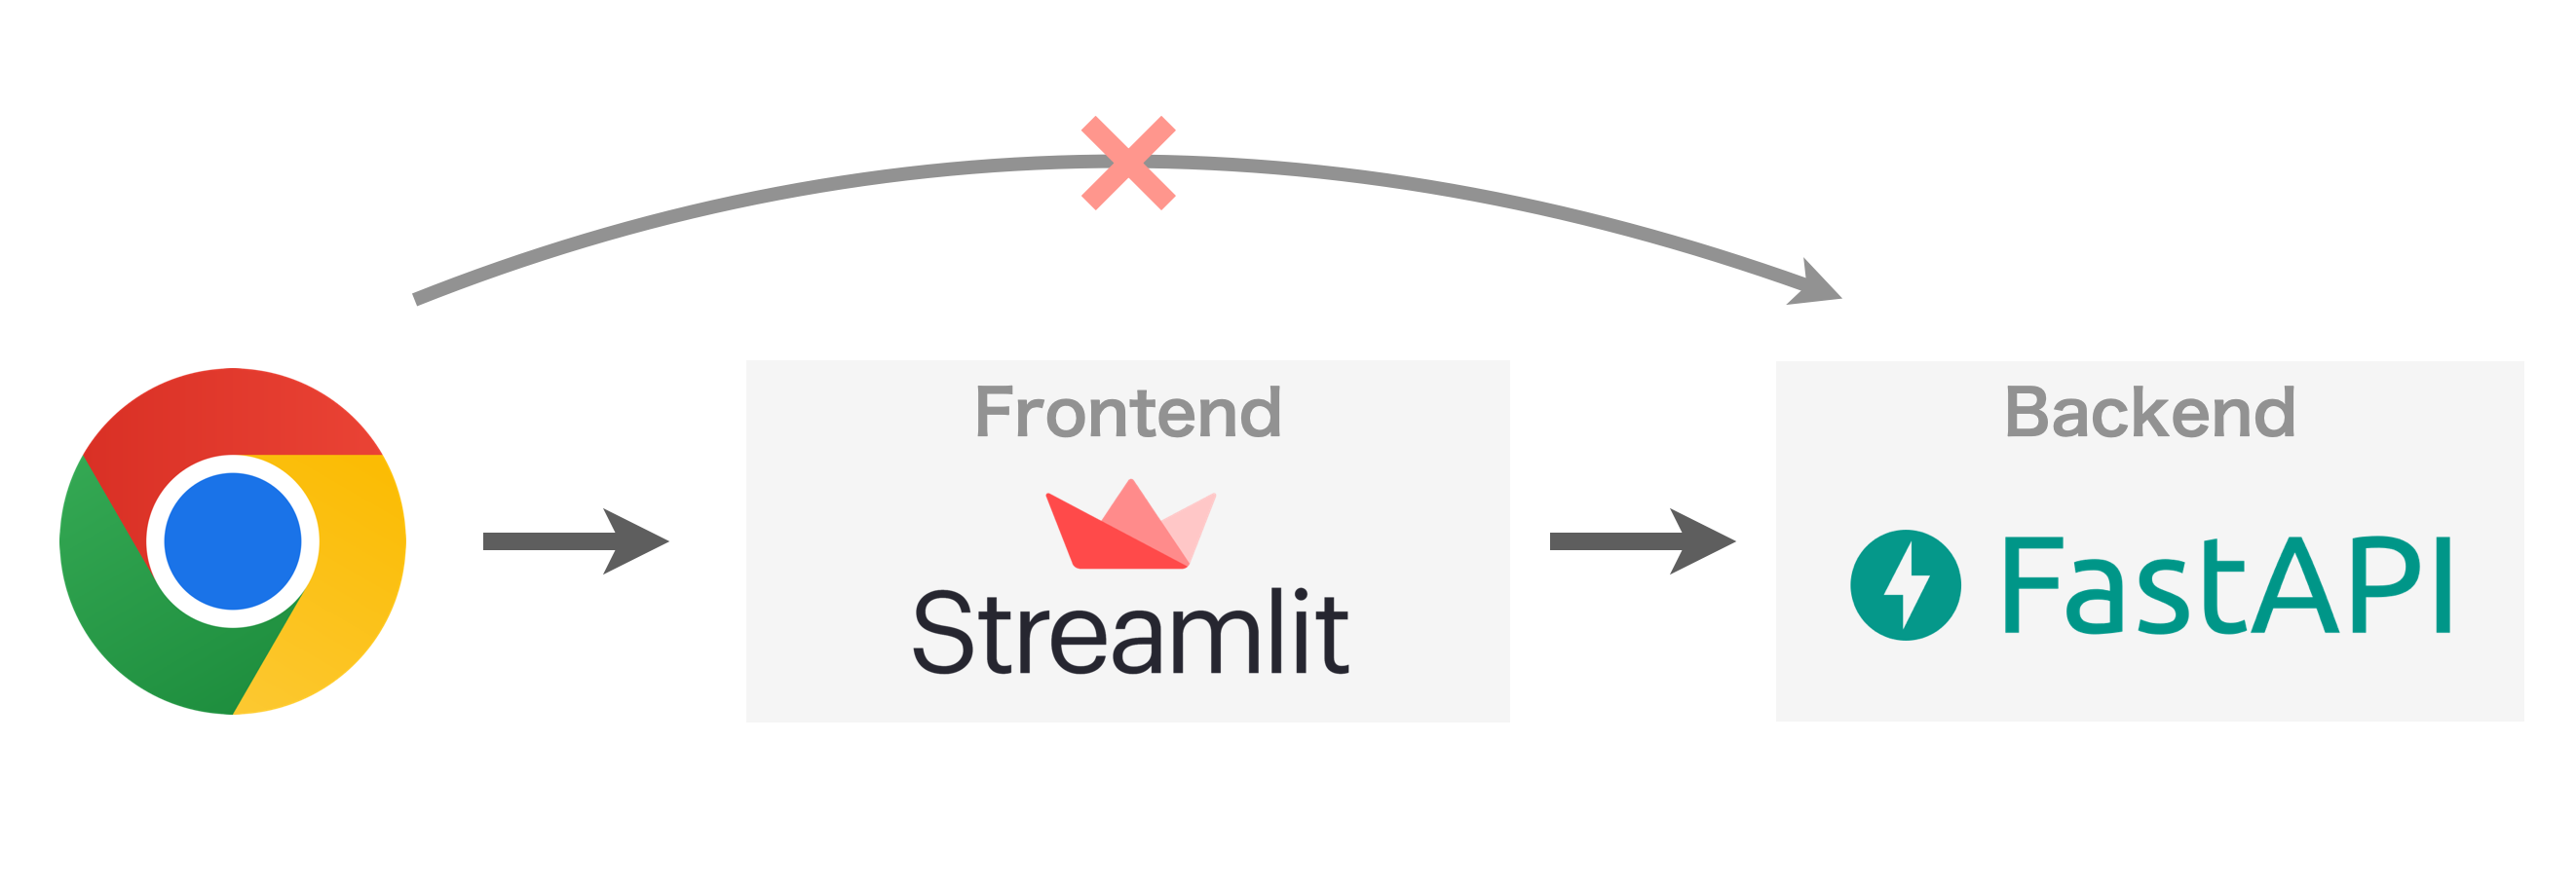
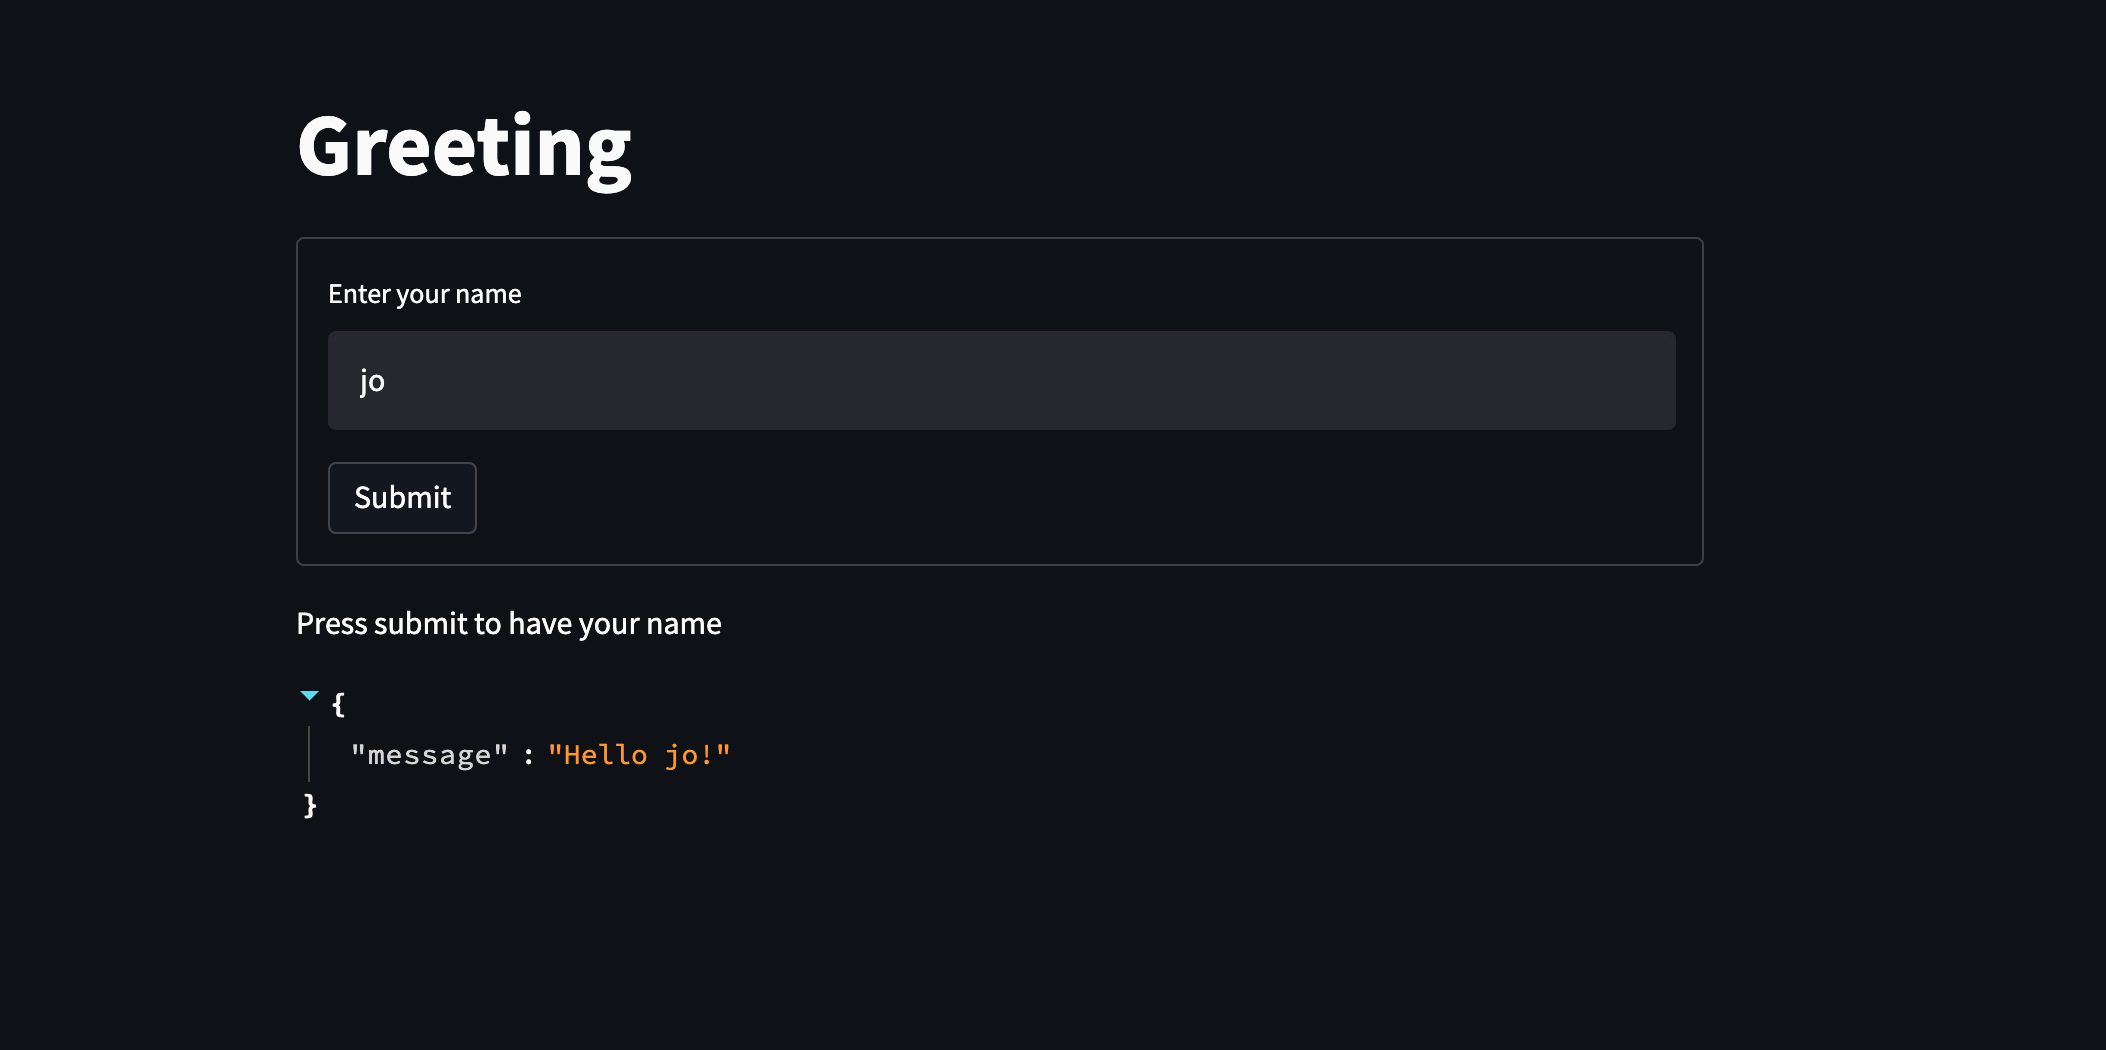
アプリの内容は、画面に入力した名前にレスポンスとして挨拶を返す、とても単純なものとしました。
使用するソースコード一式
今回必要なファイル一式のディレクトリ構造は以下の通りです。
.
├─ backend/
│   ├─ dockerfile
│   ├─ main.py
│   └─ requirements.txt
└─ frontend/
    ├─ dockerfile
    ├─ main.py
    └─ requirements.txt
backend
backend/dockerfile
FROM python:3.9.12

RUN pip install --upgrade pip
COPY requirements.txt .
RUN pip install --no-cache-dir -r  requirements.txt

EXPOSE 8080

# Allow statements and log messages to immediately appear in the Knative logs
ENV PYTHONUNBUFFERED True

WORKDIR /app
COPY main.py .
CMD ["uvicorn", "main:app", "--host", "0.0.0.0", "--port", "8080"]
Cloud Runは8080ポートに対応しているので、portを8080に設定しています。
backend/main.py
from fastapi import FastAPI

app = FastAPI()


@app.get("/hello")
def read_root(name: str):
    return {'message': f'Hello {name}!'}
挨拶を返す非常に簡単なAPIです。
backend/requirements.txt
fastapi==0.75.2
uvicorn==0.17.6
frontend
frontend/dockerfile
FROM python:3.9.12

RUN pip install --upgrade pip
COPY requirements.txt .
RUN pip install --no-cache-dir -r  requirements.txt

EXPOSE 8080

# Allow statements and log messages to immediately appear in the Knative logs
ENV PYTHONUNBUFFERED True

WORKDIR /app
COPY main.py .
CMD streamlit run main.py \
    --browser.serverAddress="0.0.0.0" \
    --server.port="8080"
frontend/main.py
import os

import requests
from requests.compat import urljoin
import streamlit as st
import google.auth.transport.requests
import google.oauth2.id_token

URL = os.environ.get("BACKEND_URL")


auth_req = google.auth.transport.requests.Request()
target_audience = URL
id_token = google.oauth2.id_token.fetch_id_token(auth_req, target_audience)
headers = {"Authorization": f"Bearer {id_token}"}

st.title('Greeting')

form = st.form(key='my-form')
name = form.text_input('Enter your name')
submit = form.form_submit_button('Submit')

st.write('Press submit to have your name')

if submit:
    params = {'name': name}
    resp = requests.get(urljoin(URL, 'hello'), params=params, headers=headers)
    st.json(resp.json())
リクエストを投げるFastAPIのURLは、Cloud Runにデプロイして初めて払い出されるので、環境変数として読み込むようにしています。
frontend/requirements.txt
streamlit==1.9.0
google.auth==2.6.6
GCR(コンテナレジストリ)にDockerイメージをpushする
1. gcloud の設定をおこなう
PROJECT_ID={作成したプロジェクトのID}
# プロジェクトIDの設定
gcloud config set project ${PROJECT_ID}
# リージョンの設定
gcloud config set run/region asia-northeast1
PROJECT-ID には、作成したプロジェクトのIDを記載します。
2. Dockerイメージを作成する
# fastapiのDockerイメージを作成
$ cd backend/
$ docker build -t asia.gcr.io/${PROJECT_ID}/fastapi-image:v1 .

# streamlitのDockerイメージを作成
$ cd ../frontend/
$ docker build -t asia.gcr.io/${PROJECT_ID}/streamlit-image:v1 .
Dockerイメージを確認して、下記のように表示されれば構築成功です。
$ docker images

REPOSITORY                                  TAG       IMAGE ID       CREATED         SIZE
asia.gcr.io/xxxxxx-xxxxxx/streamlit-image   v1        xxxxxxxxxxxx   x seconds ago   1.33GB
asia.gcr.io/xxxxxx-xxxxxx/fastapi-image     v1        xxxxxxxxxxxx   x seconds ago   968MB
3. GCRにpushする
# fastapiのイメージをpush
$ docker push asia.gcr.io/${PROJECT_ID}/fastapi-image:v1
# streamlitのイメージをpush
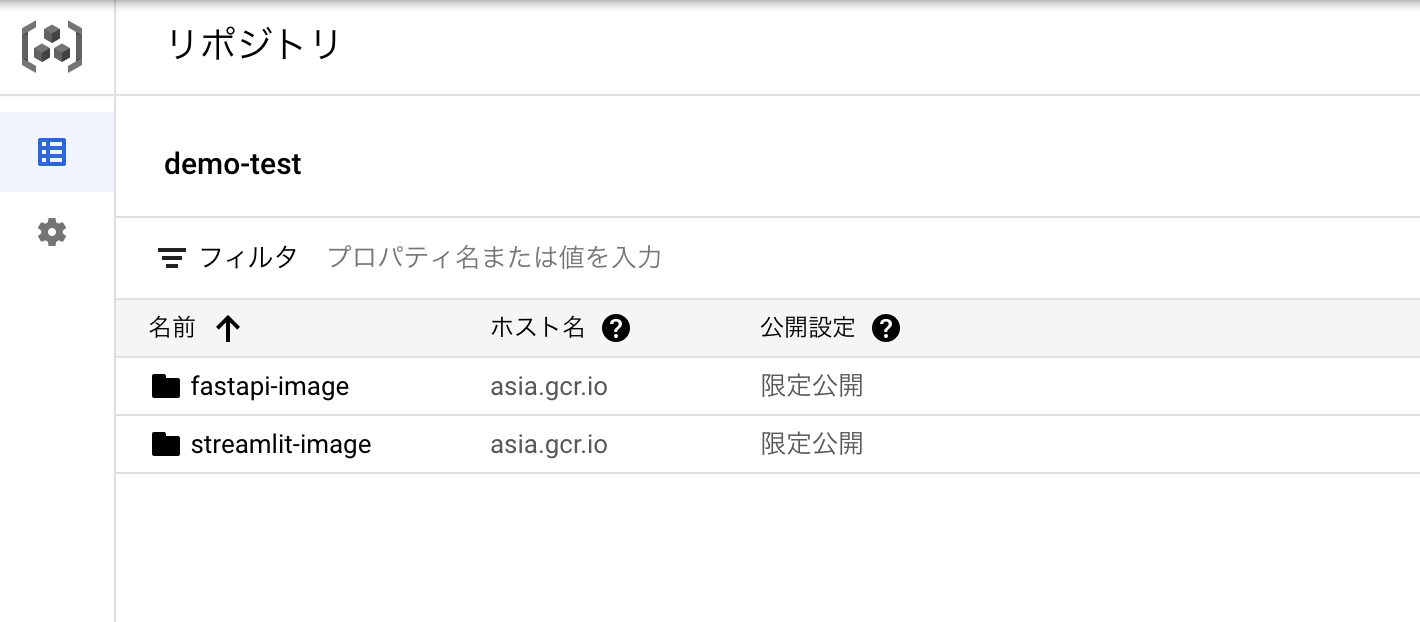
$ docker push asia.gcr.io/${PROJECT_ID}/streamlit-image:v1以上でGCRへのDockerイメージのpushは完了です。
pushしたDockerイメージはGCPコンソールで確認できます。
Cloud RunにFastAPIをデプロイ
FastAPIはアクセスが制限された限定公開のサービスとしてデプロイします。
$ gcloud iam service-accounts create fastapi-identity

$ gcloud run deploy fastapi-cloudrun \
    --image asia.gcr.io/${PROJECT_ID}/fastapi-image:v1 \
    --service-account fastapi-identity \
    --no-allow-unauthenticated

# 出力
Service URL: https://fastapi-cloudrun-xxxxxxxxxxx-an.a.run.app
成功すると、FastAPIのURLが最後に出力されます。以上でCloud Runへのデプロイは完了です。簡単ですね。
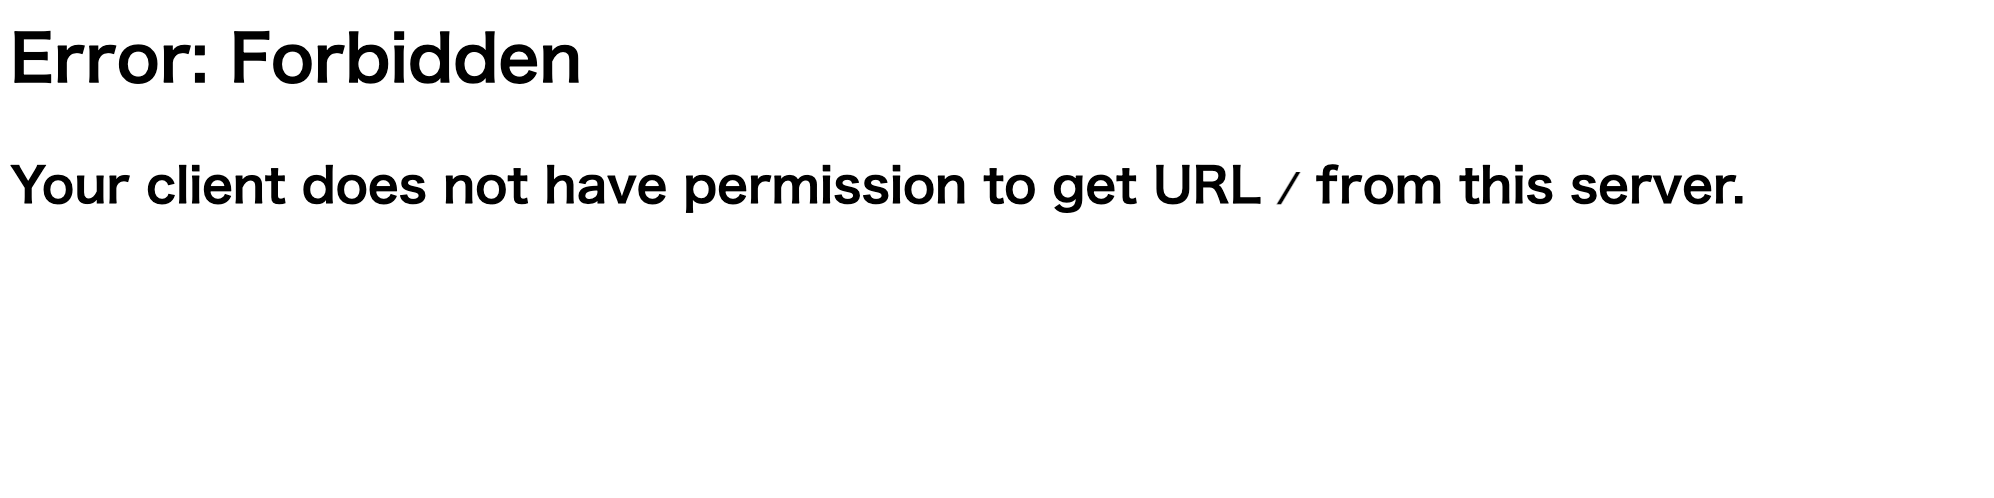
限定公開のサービスとしてデプロイしたので、Webブラウザでは 出力されたURLにアクセスすることはできません。試しにアクセスしてみると、403エラーが返却されます。
実際に動作しているかテストするには、gcloudでトークンを取得し、Authorization ヘッダーを挿入してリクエストを投げます。
# トークンを取得
$ TOKEN=$(gcloud auth print-identity-token)

# リクエストを投げる
$ curl -H "Authorization: Bearer ${TOKEN}" \
    "https://fastapi-cloudrun-xxxxxxxxxxx-an.a.run.app/hello?name=Alice"

# 出力
{"message":"Hello Alice!"}
このようにメッセージが返却されれば成功です。
(curl に指定するURLは、Cloud Runへデプロイした際に払い出されたService URLを指定してください。)
Cloud RunにStreamlitをデプロイ
Streamlitは誰でもアクセスできる一般公開のサービスとしてデプロイします。
以下ではCloud RunにデプロイしたFastAPIを利用できるようにアクセス権の付与と、FastAPIのURLを環境変数として与えています。
$ gcloud iam service-accounts create streamlit-identity

$ gcloud run services add-iam-policy-binding fastapi-cloudrun \
    --member serviceAccount:streamlit-identity@${PROJECT_ID}.iam.gserviceaccount.com \
    --role roles/run.invoker

$ gcloud run deploy streamlit-cloudrun \
    --image asia.gcr.io/${PROJECT_ID}/streamlit-image:v1 \
    --service-account streamlit-identity \
    --set-env-vars BACKEND_URL=https://fastapi-cloudrun-xxxxxxxxxxx-an.a.run.app \
    --allow-unauthenticated

# 出力
Service URL: https://streamlit-cloudrun-xxxxxxxxxxx-an.a.run.app
成功すると、StreamlitのURLが最後に出力されます。以上でCloud Runへのデプロイは完了です。
出力されたURLにブラウザでアクセスしてみます。下図のように画面が表示され、FastAPIからのレスポンスも確認できました。
Cloud Runで公開しているサービスはGCPコンソールで確認できます。
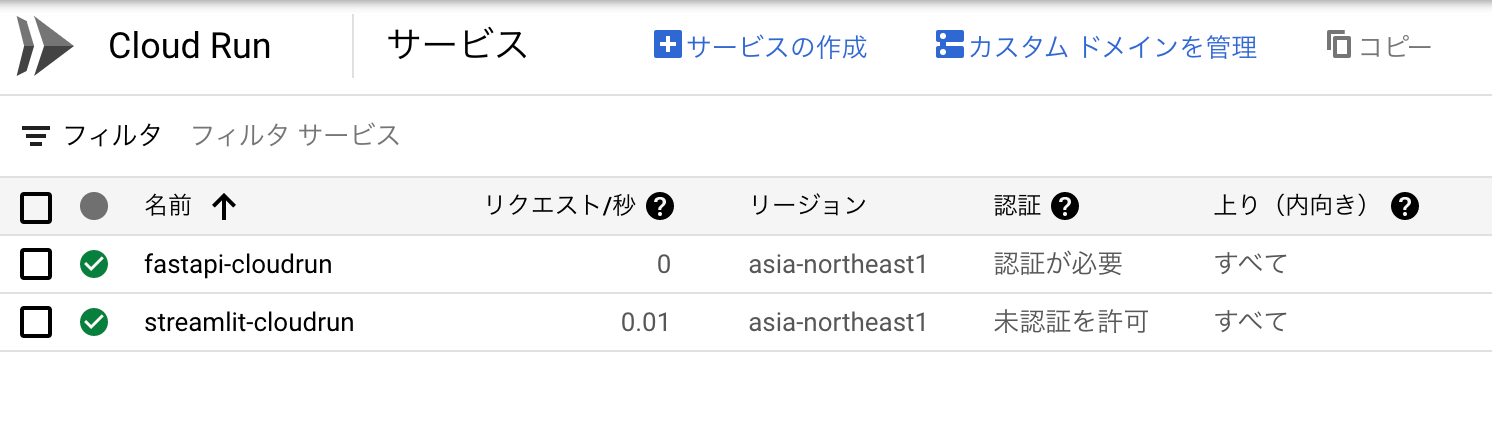
以上のようにCloud RunへFastAPIとStreamlitをデプロイすることができました。
おまけ Dockerイメージのサイズを小さくする
dockerのmulti-stage buildを用いることで、dockerイメージの容量を小さくすることができます。
ホストのpythonパッケージ管理はpoetryを使用しているものとして、dockerfileの例を示します。
fastapi dockerfile
# building stage
FROM python:3.10 as builder

WORKDIR /opt

COPY ./pyproject.toml ./poetry.lock* /opt/

RUN pip install poetry && \
    poetry config virtualenvs.create false && \
    poetry install --no-dev && \
    rm -rf ~/.cache


# production stage
FROM python:3.10-slim

COPY --from=builder /usr/local/lib/python3.10/site-packages /usr/local/lib/python3.10/site-packages
COPY --from=builder /usr/local/bin/uvicorn /usr/local/bin/uvicorn

COPY ./app /app
WORKDIR /app

EXPOSE 8080

# Allow statements and log messages to immediately appear in the Knative logs
ENV PYTHONUNBUFFERED True

CMD ["uvicorn", "main:app", "--host", "0.0.0.0", "--port", "8080"]
streamlit dockerfile
# building stage
FROM python:3.10 as builder

WORKDIR /opt

COPY ./pyproject.toml ./poetry.lock* /opt/

RUN pip install poetry && \
    poetry config virtualenvs.create false && \
    poetry install --no-dev && \
    rm -rf ~/.cache


# production stage
FROM python:3.10-slim

COPY --from=builder /usr/local/lib/python3.10/site-packages /usr/local/lib/python3.10/site-packages
COPY --from=builder /usr/local/bin/streamlit /usr/local/bin/streamlit

COPY ./app /app
WORKDIR /app

EXPOSE 8080

# Allow statements and log messages to immediately appear in the Knative logs
ENV PYTHONUNBUFFERED True

CMD streamlit run main.py \
    --browser.serverAddress="0.0.0.0" \
    --server.port="8080"
以下のようにDockerイメージの容量を小さくすることができます。
REPOSITORY                                  TAG       IMAGE ID       CREATED            SIZE
asia.gcr.io/xxxxxx-xxxxxx/streamlit-image   v1        xxxxxxxxxxxx   x minutes ago      579MB
asia.gcr.io/xxxxxx-xxxxxx/fastapi-image     v1        xxxxxxxxxxxx   x minutes ago      224MB