Introduction
In this article, we will use Python to perform object detection.
Object detection is a technique for detecting what is in an image and where it is in the image.
This time, we will run “YOLO v5” on Google Colab, which makes it easy to try object detection.
In addition, you can try the code in this article at ▼

Install YOLO v5 on Google Colab
First, start by cloning the YOLO v5 repository by executing the following command in google colab.
!git clone https://github.com/ultralytics/yolov5After cloning, install the libraries required for operation. To do this, use the requirements.txt file in the cloned repository.
%cd /content/yolov5/
!pip install -qr requirements.txt
Installation is now complete.
Object detection with YOLO v5
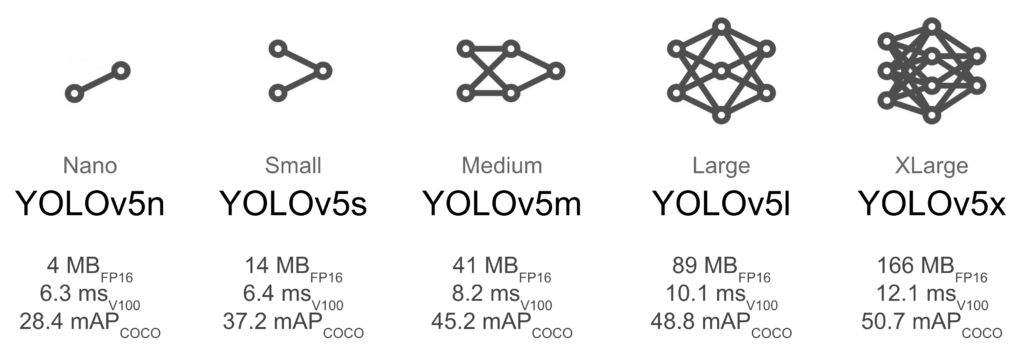
Now, let’s try object detection with YOLO v5. 5 models are available for YOLO v5, but we will use the small model, YOLOv5s.
We used this image for object detection.

In this case, we will use Google Colab, which allows us to use GPUs for free. Go to “Runtime -> Change Runtime Type” and set “Hardware Accelerator” to “GPU”.
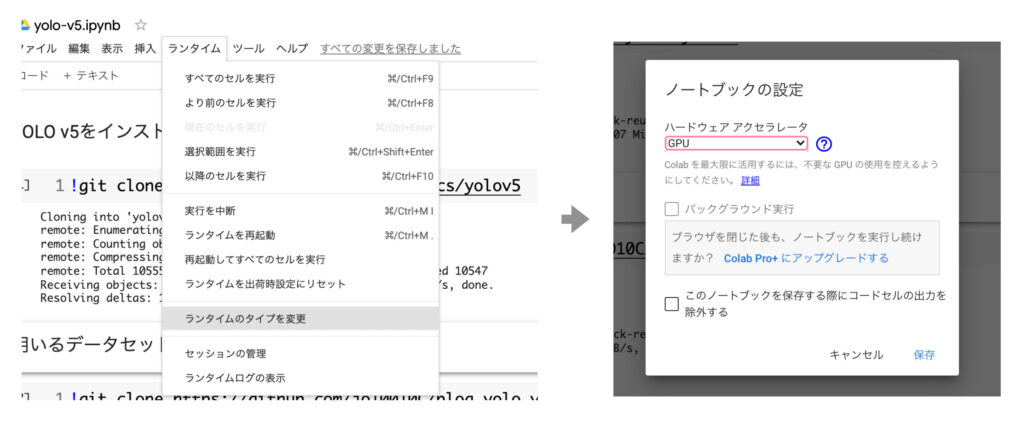
.
To perform object detection, go to the yolov5 directory, which is the cloned repository, and execute the following command
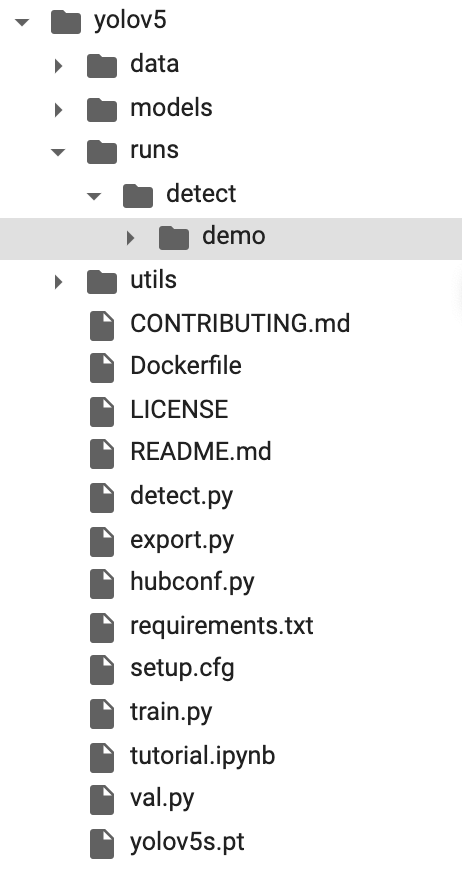
!python detect.py --source {PATH of images used for inference} --weights yolov5s.pt --conf 0.3 --name demo --exist-okAfter executing the above command, the directory /runs/detect/demo/ will be created, where the images of the object detection will be output.
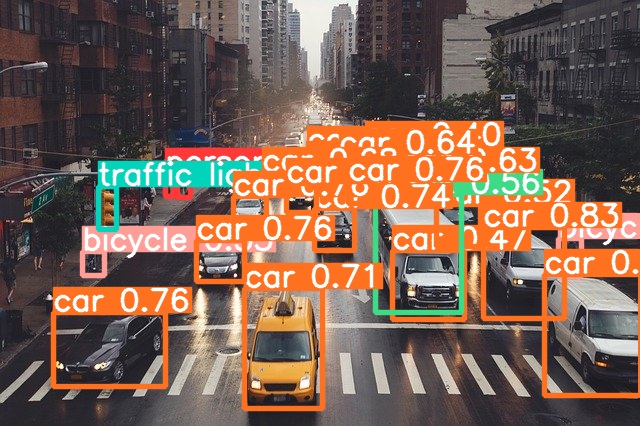
Here is the image after inference. You can see that it detects cars, signals, etc.
How to learn YOLO v5
In order to successfully infer the object you want to detect from within an image, you need to prepare a dataset specifically for that purpose and “train the model”.
This time, we tried to train the model to detect penguins.
First, let’s try to infer the penguin image using Model: YOLOv5s without training the model. The results are as follows
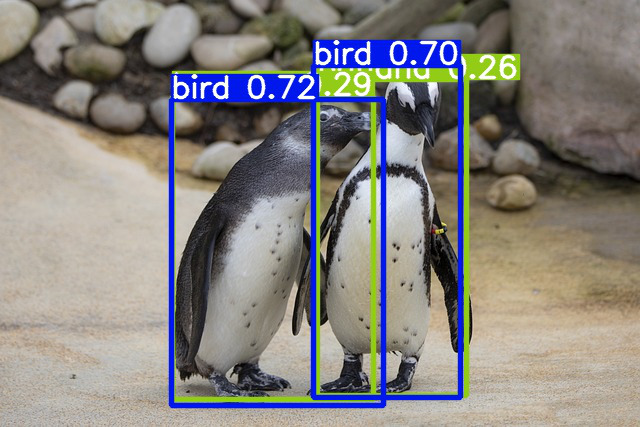
Thus detected as bird, not penguin (well, penguins are birds, so it’s not a mistake ……?). It is also detected as banana, although it is hard to see because of the overlap.
So, let’s train the model to detect it as PENGUIN.
Create training data
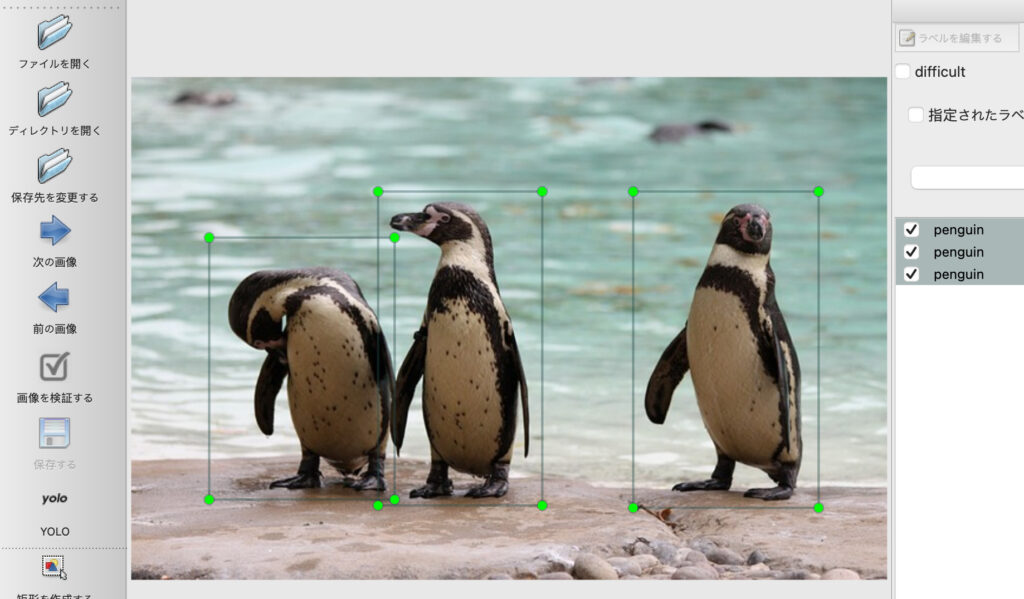
In order to train the model, we need to create teacher data on which of the images are penguins.
We have collected about 30 free images of penguins. (train: 20 images, val: 6 images)
And we used labelImg to create the teacher data. labelImg, a library, makes it easy to create txt information of rectangular coordinates indicating penguins in an image.
▼Click here to learn how to install and use labelImg.
This time, we will create a “penguins” directory and store images and labeling data there. Under the “penguins” directory, we will also place a file named “penguins.yaml”, which will be used when learning YOLOv5.
penguins
 | - penguin.yaml
 | - train
 |      | - img_・・・.jpg
 |      | - img_・・・.txt
 |      | - img_・・・.jpg
 |      | - img_・・・.txt
 |      | - img_・・・.jpg
 |    ・・・
 | - val
 |      | - img_・・・.jpg
 |      | - img_・・・.txt
 |     ・・・
 | - test
        | - img_・・・.jpg
        | - img_・・・.jpg
         ・・・
The penguin.yaml file should contain the paths to the train, val, and test folders, the number of classes to classify, and information about the classes, as shown below.
# train and val data as 1) directory: path/images/, 2) file: path/images.txt, or 3) list: [path1/images/, path2/images/]
train: /content/blog_yolo_v5/penguins/train/
val: /content/blog_yolo_v5/penguins/val/
test: /content/blog_yolo_v5/penguins/test/

# number of classes
nc: 1

# class names
names: ['penguin']
Training
To train, simply execute the following command.
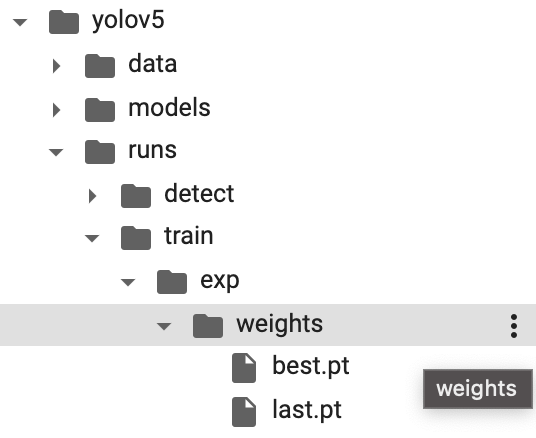
!python train.py --img 640 --batch 16 --epochs 200 --data {penguin.yamlのpath} --weights yolov5s.ptWhen training is finished, the post-training parameters are created in the directory /runs/train/exp/weight/. best.pt is the one with the highest accuracy during training, and last.pt is the one from the last epoc.
TensorBoard can also be used to graph the learning process.
# tensorboard
%load_ext tensorboard
%tensorboard --logdir runs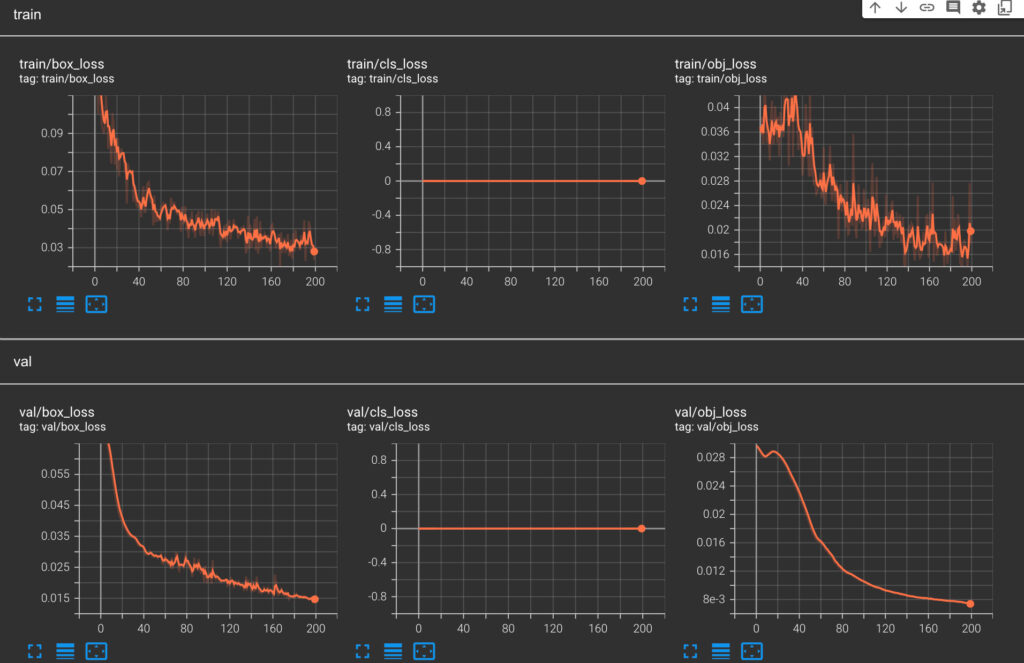
Make a deduction
Now, let’s try object detection for penguins using the trained model.
!python detect.py --source {path of test directory} --weights {path of best.pt} --conf 0.25 --name trained_exp --exist-ok --save-confThe result is as follows.

You recognize me as a PENGUIN.
In this case, a smaller model called YOLOv5s is used. Using a larger model or increasing the number of teacher data may produce an even more accurate model.